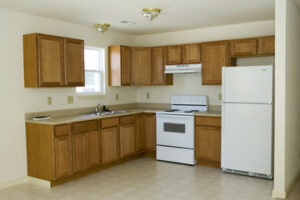
Cabinet Refinishing is an excellent option for homeowners looking to transform their kitchen on a budget. It’s also a great choice for historic preservation projects or when you want a simple color change.
While refinishing may seem like an easy DIY project, proper prep is essential to avoid a subpar result. The process can take several days, turning your kitchen into a work zone.
Cabinet refinishing is a great option if your kitchen cabinets are made of a natural material like wood or maple, and you’d prefer to keep the style intact but need to give them a fresh coat of paint or stain. It’s also a good choice if your cabinets are in relatively good condition, but you need to refresh the color.
The first step in refinishing cabinets is to clean them thoroughly. This is important because it helps ensure that the new finish will adhere properly. Use a soft cloth or sponge to remove any food residue and then wash the cabinets with soap and water. If there are stubborn grease spots, mix in a little trisodium phosphate (TSP) to emulsify the grease and make it easier to wipe away.
Next, you need to sand the cabinets lightly to prepare them for their new finish. You can use either a palm sander or a random orbital sander, but it’s best to take your time and go over the entire surface. Be sure to sand with the grain and scuff up the whole surface to help ensure even coverage. Once you’re done sanding, be sure to vacuum or vaccuum the dust off of the cabinet surfaces and tack cloth them to remove any remaining dust particles.
Once the cabinets have been cleaned and sanded, they’re ready for their primer. This is another vital step in the process that helps ensure the new finish will adhere properly and protect the cabinets from moisture and stains. A high-quality primer like KILZ 3(r) Premium Primer can be used for this application and offers excellent adhesion and stain-blocking properties.
When you’re ready to apply the final coat of finish, it’s important to work in a well-ventilated area and wear chemical gloves. This will prevent you from inhaling harmful fumes and ensure a clean, professional result. It’s also recommended to let the cabinet finish dry completely before installing it back in your kitchen.
Refinishing your cabinets is a cost-effective alternative to replacing them that can breathe new life into your kitchen and make it look brand-new again. It’s important to consider all of the options, though, before choosing whether this is the right approach for your home.
Stripping
Cabinet refinishing is a cost-effective option for homeowners who want to update their kitchen cabinets without breaking the bank on a full remodel. The process involves keeping the existing cabinet boxes in good condition, repairing any damage, and then staining or painting them with a new finish. This project is ideal for wood cabinets, but can also be done on engineered or medium-density fiberboard (MDF) cabinet boxes. The first step is to remove the cabinet doors and drawer fronts, as well as any hardware. Then, the cabinet boxes and drawers are cleaned thoroughly to remove any dirt or grease that may interfere with the refinishing process.
During the cleaning phase, the old paint or stain is stripped off using either chemical or heat strippers. The stripping process can be messy and time-consuming, but is necessary to ensure a quality finish. This is particularly true for older cabinetry, which can have multiple layers of finish that must be removed to expose the wood. A quality chemical stripper will dissolve and remove the old finish without damaging the wood underneath. Heat strippers, on the other hand, work by heating the wood to soften and remove the old finish. They are also safer to use, as they do not produce harmful fumes.
When it comes to stripping, a homeowner should always follow the manufacturer’s instructions and take proper safety precautions. It is also important to understand that completely stripping a cabinet can be difficult, especially on vertical surfaces. If the existing finish is flaking or peeling, it will likely need to be sanded before it can be stripped.
If a cabinet is being refinished for an aesthetic change, the wood can be stained instead of painted. However, this process is typically more labor-intensive and requires a professional power sander. It is also not suitable for laminate or thermofoil cabinets, which cannot be sanded or stripped.
When deciding whether to stain or paint, a homeowner should consider the color and style of their kitchen. A fresh coat of paint or stain can dramatically transform the look of a room, but it is important to consider the existing color scheme before making a decision.
Painting
A new coat of paint on your cabinets can completely change the look and feel of your kitchen. Cabinet refinishing opens up a world of customization, giving you the ability to choose from any color or shade, as well as unique accents like glass panels and trim.
Before beginning the painting phase of cabinet refinishing, it’s important to properly prepare the surface. Start by emptying your cabinets and removing any hardware that might obstruct your work. Then, clean the surfaces thoroughly with a mild detergent solution to remove any grease or grime. Once the cabinets are dry, sand the surface with medium-grit sandpaper to smooth and prepare it for priming and painting. Once the cabinets have been sanded, use a shop vac and tack cloth to remove the dust particles from the wood surface.
After sanding, apply a high-quality primer to the surface. Depending on the type of wood, you can choose between an oil-based or latex-based primer. For unstained wood, oil-based primers are recommended for their durability and stain-blocking properties. Once the primer has been applied, allow it to dry completely before applying a second coat. Using a high-quality roller or brush, paint the cabinet surfaces in even coats. It is important to apply the first coat of paint in a well-ventilated area to prevent fumes.
Once the first coat of paint has dried, you can replace any cabinet hardware that was removed during the sanding and priming process. Be sure to choose new hardware that will complement your newly painted cabinets. Once the finish is dry, you can enjoy your kitchen’s new look!
Although cabinet refinishing is less expensive than replacing your cabinets, it can still be a lengthy project. Many homeowners choose to hire a professional to speed up the process and ensure quality results. The experienced technicians at NHance have the tools and techniques to achieve a flawless cabinet upgrade on a budget.
Even the best paint job won’t last forever, especially in a kitchen that is filled with moisture and grease on a regular basis. After a few years, you’ll probably start to notice wear and tear around handles and in high-use areas. Cabinet refacing can help extend the life of your cabinetry, adding value to your home while making the space more functional for you and your family.
Applying the New Finish
When all of the preparation steps are complete, it’s time to apply the new finish. The final result will make a significant difference in the overall look of your kitchen. The application phase can take several days to a couple of weeks, depending on the size of your kitchen and the complexity of your chosen finish. It requires a high degree of patience and attention to detail to achieve a stunning transformation.
Start by lightly scuff-sanding the cabinets to prepare them for the primer. Then, wash and scrub the surface of each cabinet using a degreaser such as trisodium phosphate (TSP). This chemical emulsifies grease and makes it easier to clean with soap and water. Be sure to wear gloves when handling this harsh chemical.
After scuff-sanding and washing, it’s important to let the cabinets dry completely before moving on to staining. If the cabinets are not fully dried, any new finish will peel. To prevent this from happening, apply a few coats of a high-quality primer to the cabinets. Let the primer dry between each application.
Next, it’s important to properly stain the cabinets to ensure a long-lasting, durable finish. Whether you choose to stain the wood or apply a polyurethane, it’s crucial to follow the manufacturer’s instructions carefully. Be sure to use a high-quality brush or sprayer and apply the stain in thin coats. Between each coat, sand the cabinets lightly to remove any rough areas.
Finally, once the stain has fully dried, it’s time to apply a few coats of paint. It’s important to choose a high-quality paint that is designed for cabinetry, such as acrylic or enamel. It’s also essential to stir the paint thoroughly before applying it and to continue stirring at regular intervals during the painting process. This helps ensure the pigments are evenly dispersed, resulting in a uniform color.
Cabinet refinishing is an excellent option for homeowners who want to update their existing cabinets without spending the money to replace them. This is a cost-effective, eco-friendly, and easy way to give your home’s kitchen a fresh, new look. With proper preparation, attention to detail, and careful handling of drips and mistakes, you can achieve a beautiful, long-lasting finish that will transform your kitchen.